Property Types
HDB BTO Renovation Guide
Nestly Editorial
October 15, 2026 • 5 min read
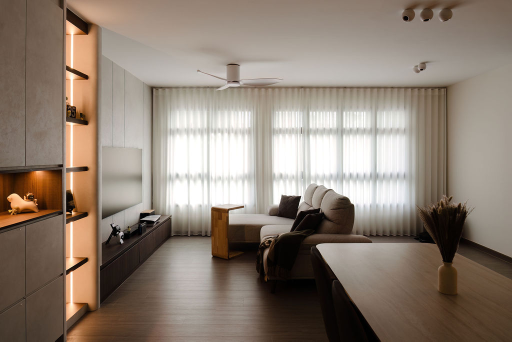
Start your BTO renovation by confirming what your flat includes, preparing a room-by-room brief and comparing the same scope with different firms. After key collection, check the actual flat before finalising measurements and work. A useful plan connects your budget, design decisions, approvals and delivery dates rather than relying on a fixed renovation package or a promised number of weeks.
Before collecting your keys: prepare your brief
Gather your floorplan and the information supplied for your flat. List which finishes and fittings are included and which items you intend to retain. Do not assume every BTO has the same starting specification.
- For each room, write down how you will use it, who uses it and what needs storage.
- Separate must-haves from optional features, including built-in carpentry, a study area and changes to kitchen storage.
- Record preferred materials and colours, cleaning preferences and any access needs.
- Share your expected key-collection and move-in dates, noting which dates are still uncertain.
You can explore ideas with Nestly's free AI floorplan concept tool. Treat the output as inspiration, not a measured plan: a designer must check dimensions, openings and services. Read the tool's contact-sharing consent before submitting.
At key collection: inspect before covering things up
Walk through the flat, record concerns with clear photographs and keep a list by room. Distinguish possible defects from changes you simply want for your preferred design. Discuss outstanding issues before installing finishes or carpentry that could hide them.
HDB explains that, within the one-year Defects Liability Period, owners can submit a rectification request online or at their precinct's Building Service Centre. Check the process and applicable dates for your flat using HDB's defects guidance. Coordinate access and rectification with your renovation team rather than assuming they can proceed independently.
Build your budget from the work you need
A flat-size price range alone cannot tell you what your renovation will cost. Ask for an itemised quotation based on the actual scope, specifications and quantities. Keep renovation works, loose furniture, appliances and moving costs visible as separate budget categories.
- Retain or replace: identify existing flooring, doors and fittings you want to keep.
- Carpentry: confirm dimensions, materials, internal fittings, hardware and worktops.
- Electrical and plumbing: clarify points, fixtures, relocation, supply and installation.
- Site costs: ask about protection, delivery, disposal and cleaning.
- Unconfirmed items: label allowances, exclusions and tax treatment, and discuss how changes are approved.
Keep a separate allowance for decisions that are not yet priced. Its size should reflect your unresolved scope rather than an assumed universal percentage. Compare proposals on the same brief and ask each firm to explain differences. This guide does not publish a cost range without current, comparable evidence.
Use our renovation cost calculator to turn your BTO work list into a planning estimate. Select only the work you need, enter quantities and compare the total with your available budget. The HDB work-item figures use researched range midpoints; they are estimates, not a package quotation or a measured market median. Check omitted work and tax with your firm.
Check the contractor and the proposed work
HDB states that flat owners must engage contractors from its Directory of Renovation Contractors and ensure renovation work follows its guidelines. Some works require permits and others do not. Check the exact proposal against HDB's renovation information; do not assume a wall, window or wet-area change is allowed because it appears in a reference picture.
Ask who will carry out the work, who handles any required submissions and what must be approved before work starts. Clarify the responsibilities of the design firm and contractor. Our interior designer selection checklist covers questions about relevant projects, credentials and written terms.
Plan the sequence, then agree dates
Use the following sequence as a discussion checklist, not a guaranteed construction programme. Your contractor should adapt it to the work and approvals involved.
- Confirm the starting condition: inspect the flat and coordinate any outstanding rectification.
- Finalise the design: verify measurements, layout, scope, materials and appliance requirements.
- Clear prerequisites: confirm necessary permissions, site arrangements and long-lead items.
- Coordinate the work: agree the order of trades, fabrication and installation with your project lead.
- Inspect and hand over: record outstanding items, completion checks and follow-up arrangements.
Ask for dependencies as well as dates: what happens if a material is unavailable, an approval is outstanding or a design decision changes? Agree who updates you and how changes to cost or timing are documented. Arrange furniture deliveries against confirmed site readiness.
Your first-meeting checklist
- Floorplan, key-collection information and known flat specifications.
- Room-by-room needs and a list of items to retain.
- Budget categories and optional features you could defer.
- Reference images clearly labelled as inspiration.
- Questions about exclusions, site management, payments, changes and handover.
Browse BTO renovation portfolios for discussion ideas, or request free interior designer matching with Nestly. Review the consent explaining contact sharing; you decide whether to engage a firm after discussing its proposal.
Official sources checked on 28 September 2026: HDB defects and renovation guidance, linked above. Confirm current requirements for your flat and proposed works before proceeding.